Adding on to Make Long Videos
Advanced Cartooning with Veo 3
My goal for this video was to create a long cartoon video. Here is the result:
Process
For this video, I began with a prompt. The prompt read:
A cute cartoon mouse carrying a brown wooden bowl filled with yellow cake batter runs around his kitchen. The mouse accidentally steps a metal whisk on the floor, and falls flat on his face. The bowl flies out of his hands, and falls onto the ground. The batter spills out.
In order to add on to the video, I took a screenshot of the last frame of the previous video, and insterted the screenshot into Veo 3 Frames to Video mode. This way, all of the smaller individual clips will seem like one long continuous video.
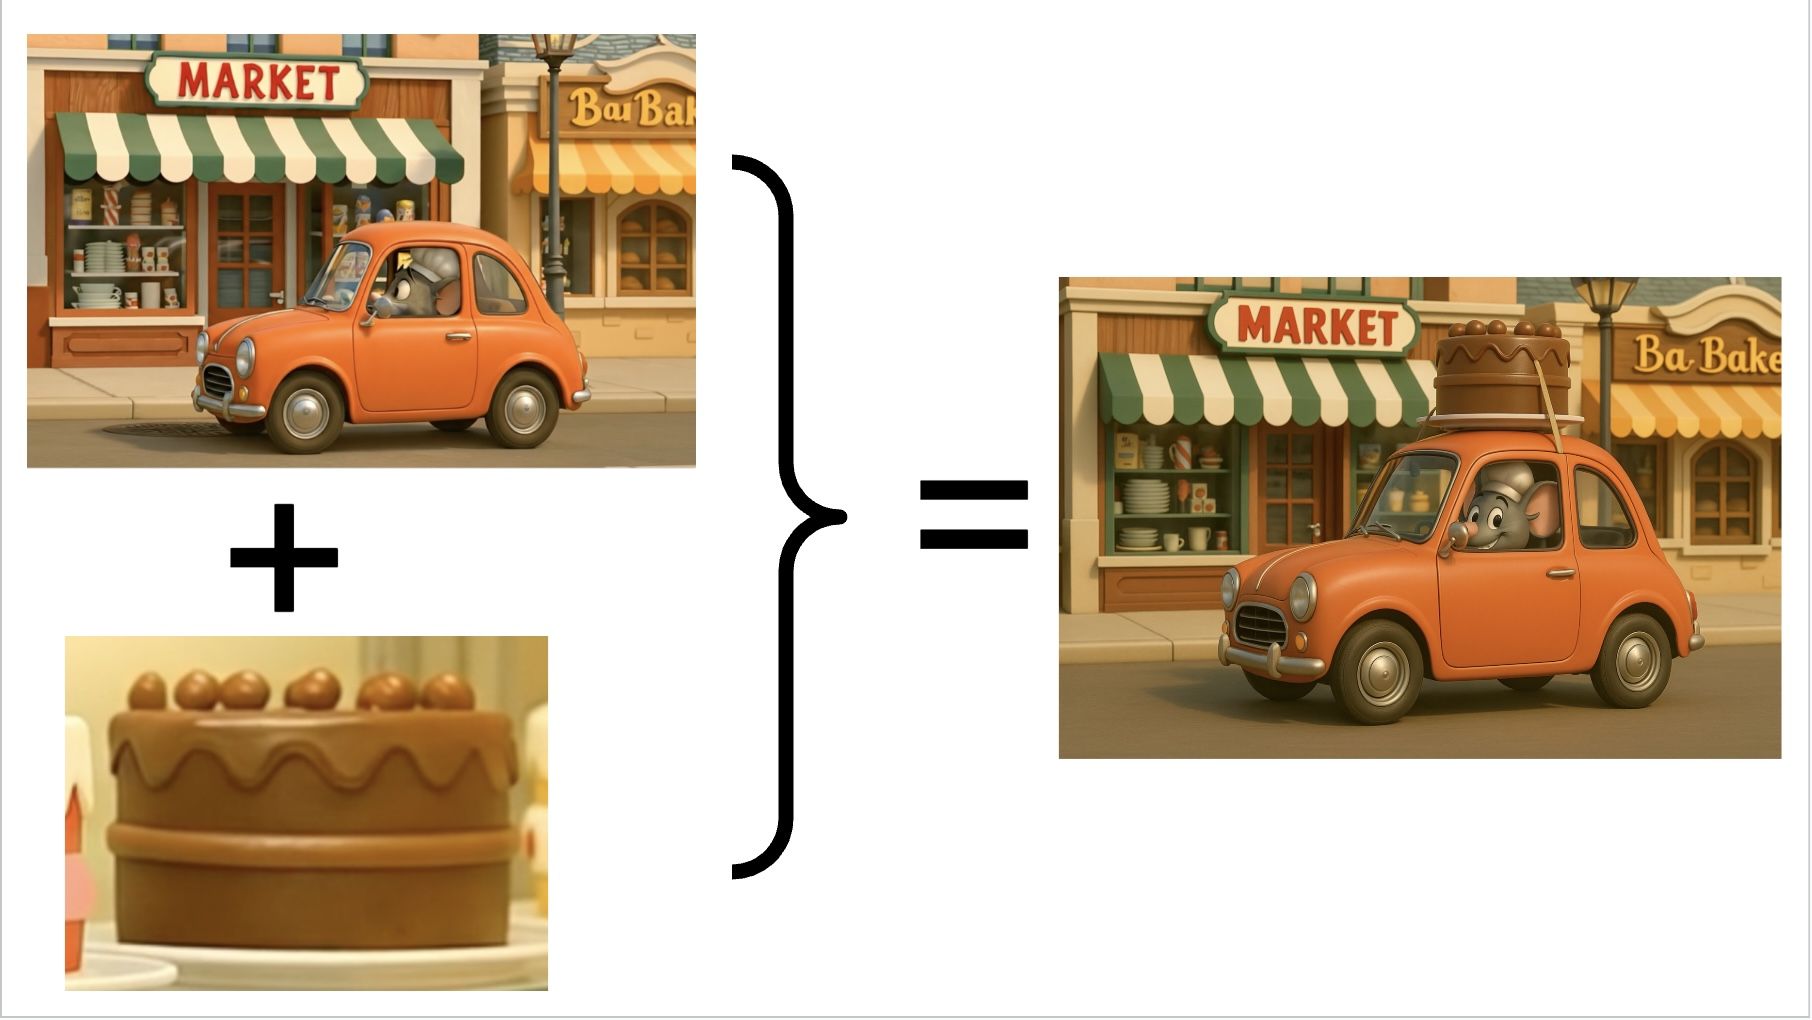
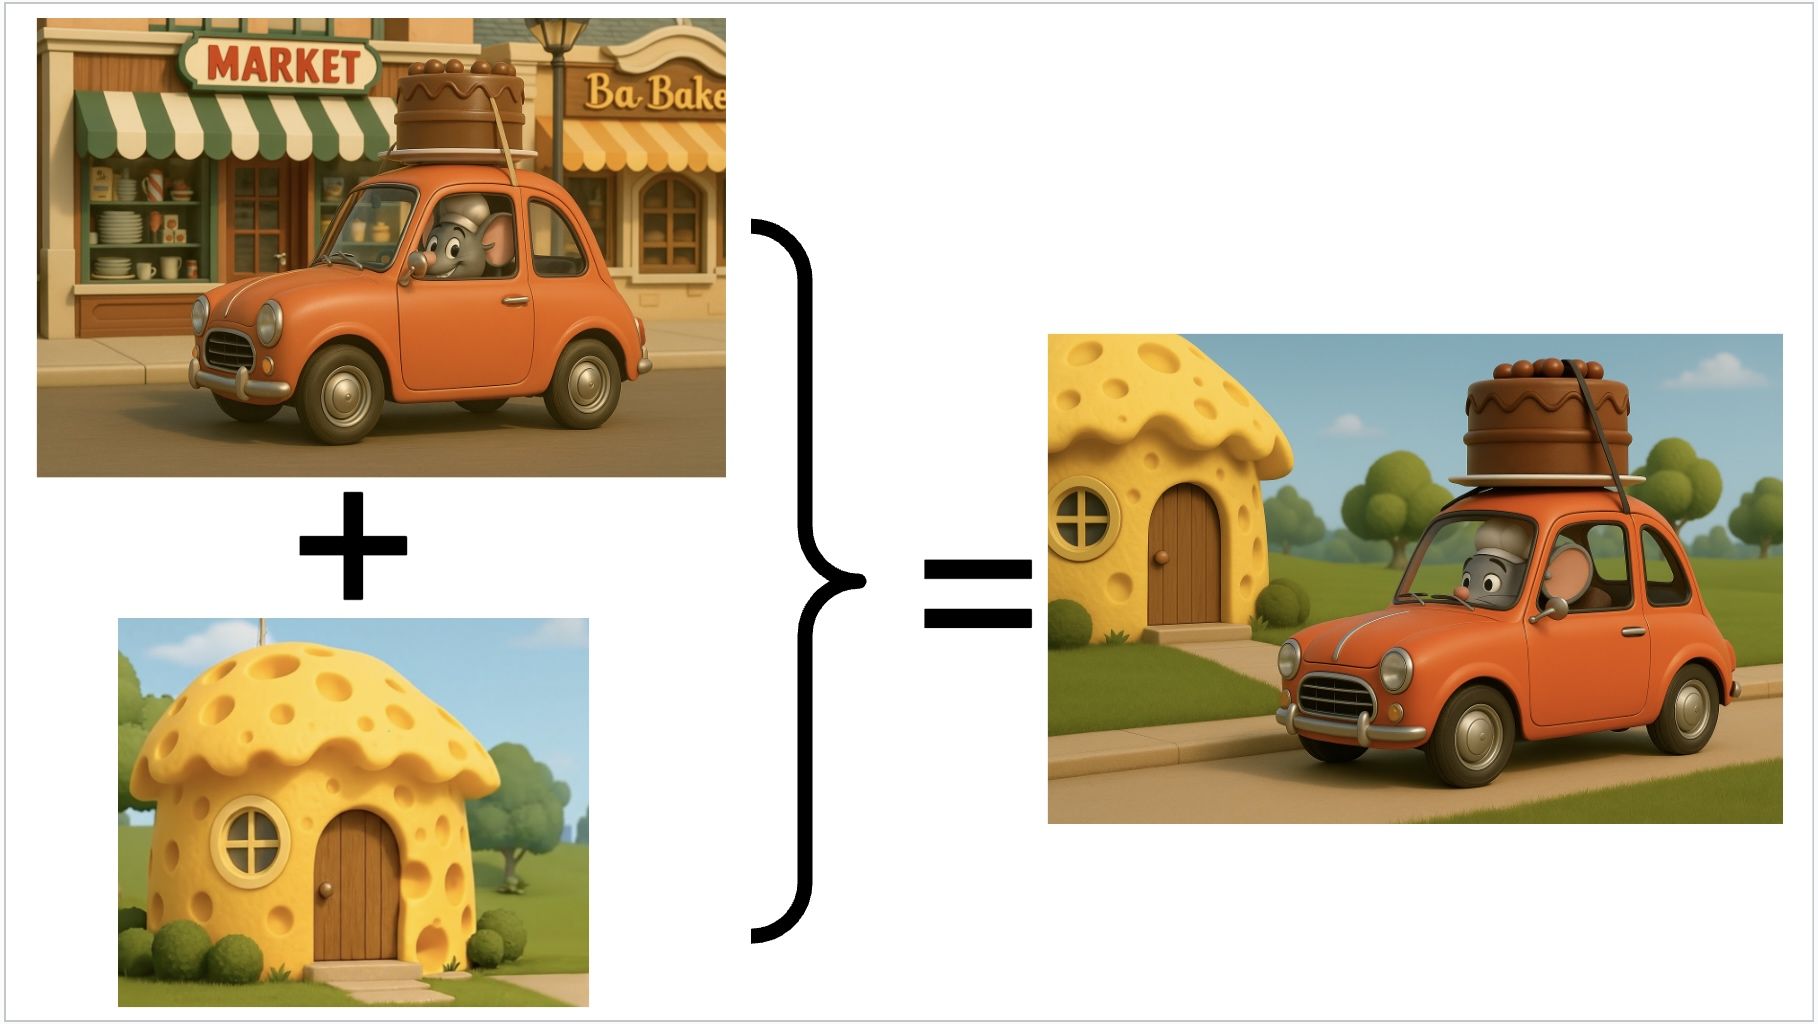
For some video clips, I needed to combine two images. For instance, in the scene where the mouse drives back to his cheese house after buying the big chocolate cake, I needed to combine the cake image and the car in front of the bakery image. I used Chat GPT to combine many images throughout the making of this video.
Step 1: Market + Cake
Step 2: (Market + Cake) + House
Challenges
This 100 seconds long video contains 24 seperate 8 second long video clips all together. Veo 3 doesn't allow users to directly add on more video clips, which gives people who want to create a longer, continuous video a harder time. Directly adding on to a video is a great feature that Veo 2 has, because it takes the last frame from the previous clip, and generates a second clip, that smoothly transitions into the first. This creates a longer video that looks continuous. However, Veo 3 doesn't have this feauture, as many things are still in being experimented on.
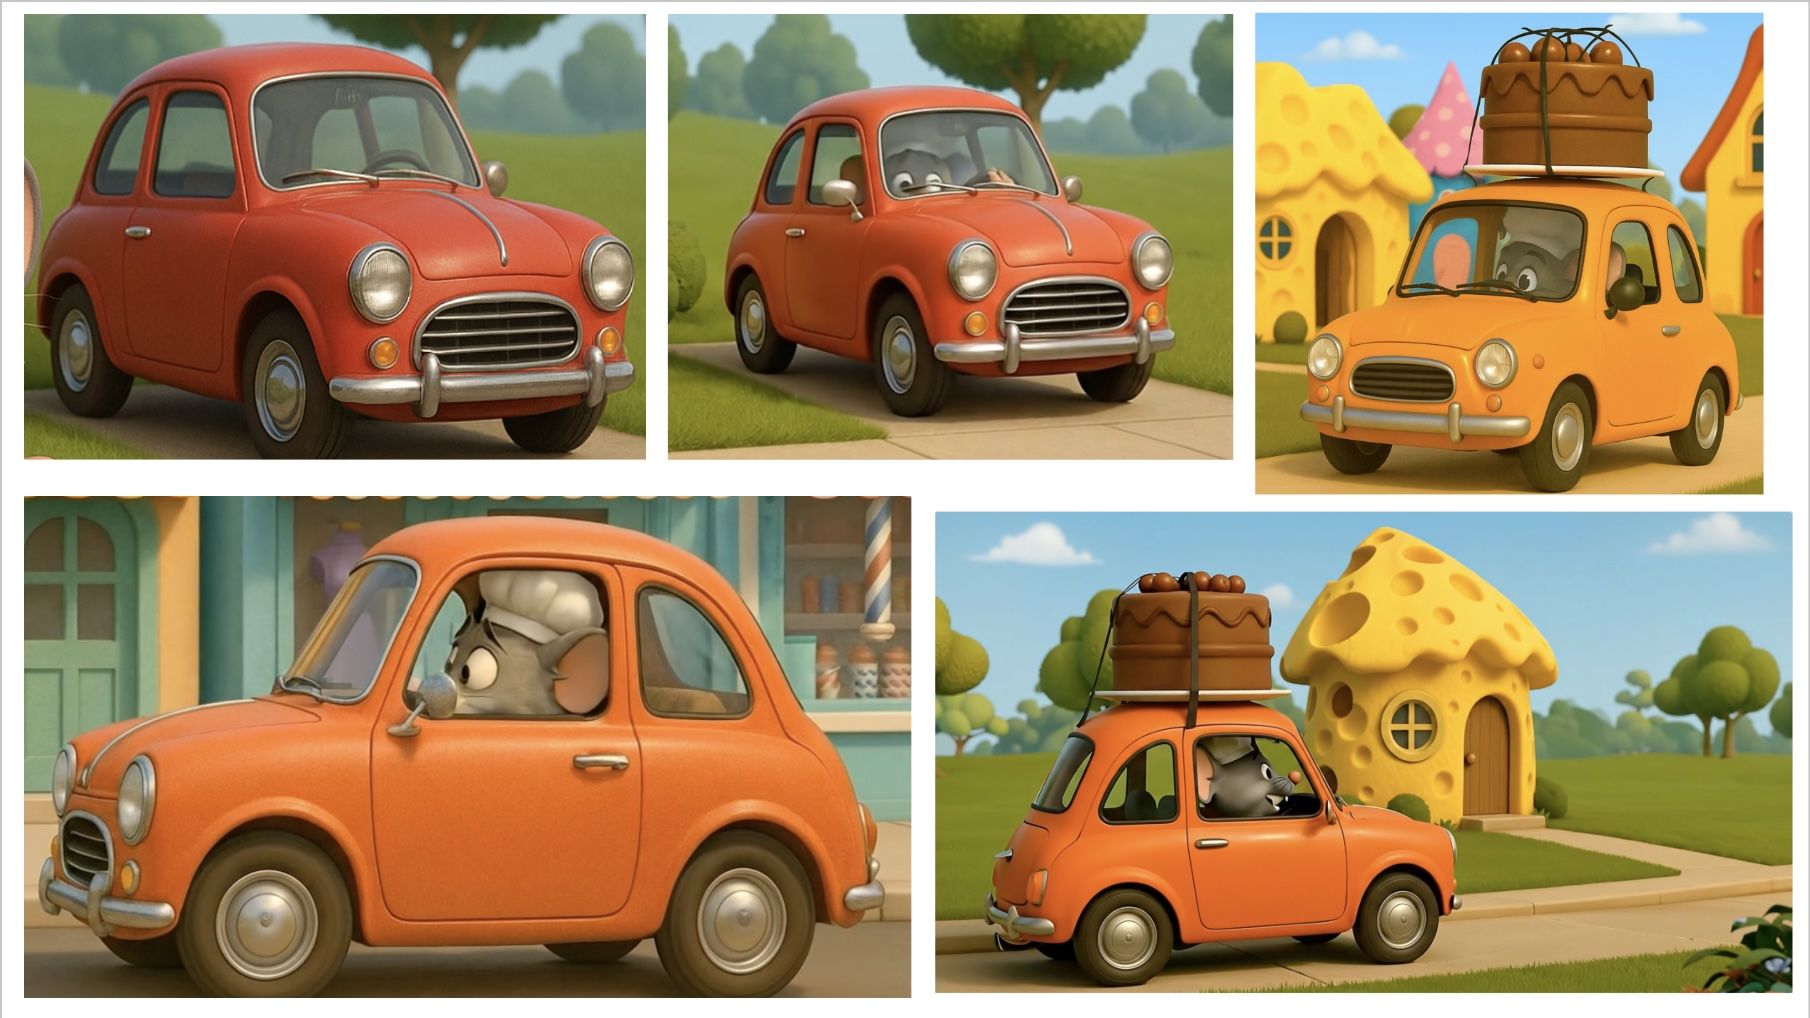
In order to create a longer video, I took a screenshot of the last frame of the previous scene. Using Veo 3 Frame to Video mode, the video continuously followed the other clip smoothly most of the time. However, a challenge I faced while using this screenshot strategy was that over time, details started to change. For example, the mouse's car changed from a red color to an orange color over the video. Here is an image showing all the car images shown throughout the video. As you can see, they all look different.
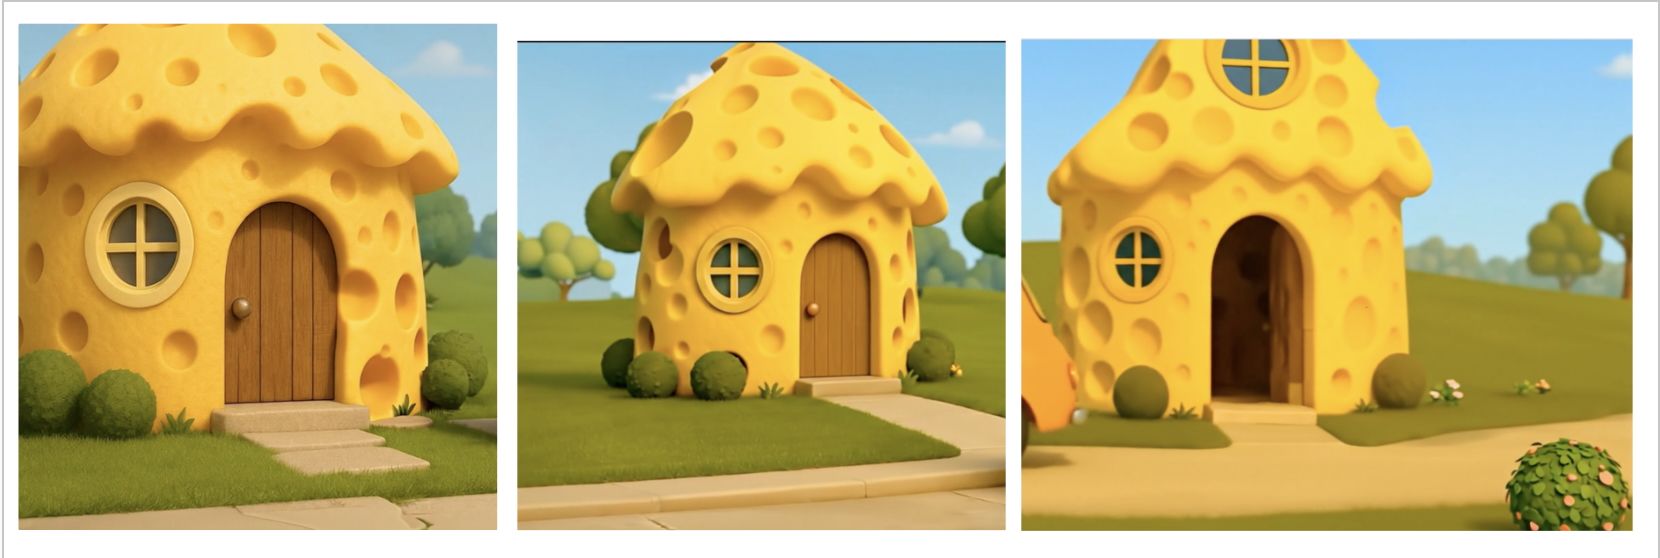
Other examples include the mouse's clothing change, and landscaping for the cheese house. An analogy for this is like playing a game of Telephone. The more people that play, the higher the chance that the phrase or word given in the begining is going to change. Similarly, the longer the video and the more times a screenshot is taken, the greater the change in details. Here are more images showing differences.

When using Frame to Video mode, the only information that Veo 3 has is the image inserted. This is important to remember, because if the character, outfit, or any other details aren't shown in the image, then the result will not include them. For example, I gave Veo 3 this image and this prompt. The prompt says:
The mouse stops. He then gets out of the car, and stands up, looking at the cake.
Here was the result:
As you can see, since the mouse's whole body wasn't shown in the screenshot I inserted, Veo 3 generated a video totally different. Over time, smaller details would change, because the image I inserted didn't contain the mouse's outfit, or the landscape around the cheese house.
Conclusion
Overall, throughout this video, I realized how important it was when using Frame to Video to screenshot at a good image in order to have the results wanted.
- ← Previous
Using Prompts for Dialog - Next →
AI With Caitlin Class